
WD Drive Driver Not Installed: Assessing Data Integrity and Safe Recovery Steps
Published 2026-09-25 | JiWang Data Recovery Technical Team
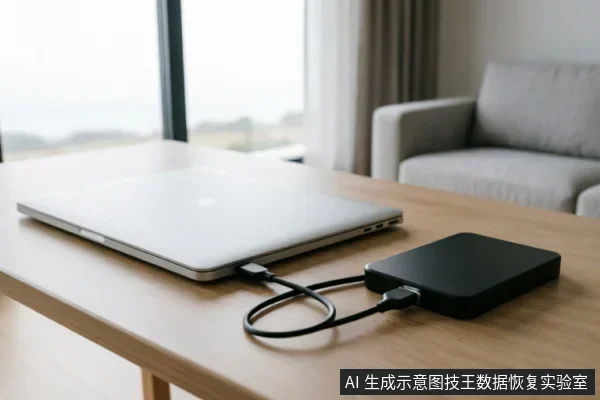
Initial Assessment of Device Recognition and Backup Status
When a WD drive displays a driver installation error, the immediate priority is to assess the device'
Critical Warning Signs: When to Stop Power Cycles
When a WD drive displays driver installation errors, the immediate priority is preserving data integrity rather than forcing software fixes. The first critical step is to verify if the system physically recognizes the device at the hardware level. If the drive does not appear in disk management or BIOS, further power cycling may exacerbate underlying issues. Before attempting any driver fixes, verify if the drive is physically recognized by the system and check for existing backups. This verification process ensures that you are not working with a completely unresponsive unit that requires specialized recovery services. Simultaneously, it is essential to assess the availability of prior data copies. If recent backups exist, the risk profile changes significantly, allowing for more aggressive troubleshooting steps on the primary drive. However, if no backups are present, caution becomes paramount. Avoid formatting, initializing, or writing new data to the drive to protect original media. Any attempt to format or initialize the volume can overwrite critical file structures, making future recovery impossible. Similarly, writing new data introduces unnecessary write cycles that may interfere with the drive’s ability to respond correctly during diagnostic phases. Power cycling should be limited to brief intervals. Repeatedly turning the device on and off without clear recognition signals can stress the connection interface. If the drive fails to stabilize after minimal attempts, disconnecting it immediately prevents potential electrical anomalies from affecting the host system. Observing LED indicators and listening for unusual sounds provides additional context. Silence often indicates a lack of power delivery, while clicking noises suggest mechanical resistance. In such cases, professional intervention is advisable. Do not rely on software tools to force recognition if the hardware state remains ambiguous. Prioritize physical inspection and backup verification over complex driver installations.
Step-by-Step Protocol for Safe Data Preservation
| Diagnostic Phase | Observable Indicators | Mandatory Action Protocol |
|---|---|---|
| Phase 1: Immediate Risk Assessment | The system reports that the device driver is not installed. The operating system fails to recognize the storage unit, or the device appears intermittently in the device manager with error codes indicating missing drivers. | Do not attempt automatic driver updates or software installations. Repeated power-on attempts and long scans are strictly prohibited when the drive exhibits abnormal sounds, frequent disconnections, or capacity anomalies. These signs indicate potential instability that requires immediate cessation of active operations to prevent further data loss. |
| Phase 2: Connection Verification | The device remains undetected despite correct port selection. No LED indicators illuminate on the external enclosure, or the connection drops repeatedly within seconds of establishment. | Confirm external connections first. Inspect all physical cables for integrity. Ensure the USB or SATA interface is securely seated without force. If the connection is unstable, replace the cable immediately rather than continuing to query the device. This step isolates interface faults from internal drive failures. |
| Phase 3: Decision Matrix | After verifying stable physical connections, the drive still shows driver errors or fails to mount. The system logs continue to show communication timeouts. | Decide on read-only assessment. If the drive powers on but cannot be written to, do not force write operations. A read-only assessment determines if data can be extracted safely without triggering further degradation. This approach prioritizes data preservation over immediate usability, ensuring that no additional stress is placed on a potentially failing component. |
Distinguishing Software Errors from Physical Damage
- Verify Physical Recognition: Check if the system detects the drive’s presence before attempting any driver fixes. This confirms whether the hardware interface is active.
- Check for Existing Backups: Before proceeding with repairs, ensure that any critical data has been backed up elsewhere. This protects original media from accidental overwriting.

Avoid formatting, initializing, or writing new data to the drive under any circumstances. These actions can permanently overwrite recoverable information. If the drive is recognized but drivers are missing, update them via Device Manager. If the drive is not recognized, do not force initialization. Instead, stop further attempts and seek professional assessment to prevent irreversible data loss.
Final Verification Before Any Write Operations
Before initiating any write operations, it is critical to assess the current stability of the storage device. The integrity of your files depends heavily on avoiding further stress to the hardware during this phase. If the drive exhibits abnormal sounds, frequent disconnections, or capacity anomalies, stop repeated power-on attempts and long scans immediately. These symptoms often indicate underlying instability that could worsen with continued use. Continuing to run diagnostics or access files under these conditions may lead to data loss or permanent failure. Instead, prioritize confirming external connections first, then decide on read-only assessment. This approach minimizes the risk of triggering automatic processes like background recycling mechanisms, which can permanently erase deleted data on SSDs. For mechanical drives, unusual noises suggest potential head or platter issues, making further operation dangerous. In all cases, avoid running tools such as system repair utilities or defragmentation utilities, as they force write operations that compromise data safety. Do not attempt physical repairs or open the drive casing, as this voids warranties and introduces contamination risks. If the device remains unstable after checking cables and ports, disconnect it from the system and seek professional assistance. Only proceed with backups or transfers if the drive demonstrates consistent connectivity and no error signals. Remember, once data is written or modified, recovery becomes significantly more difficult. Therefore, caution and verification are essential steps before taking any action that alters the disk state.
Frequently Asked Questions
How do I verify if the drive is physically recognized by the system?
Check the operating system's device manager or disk utility to confirm the drive appears in the list of connected hardware without errors.
What actions should be avoided to protect the original media before recovery?
Do not format, initialize, or write any new data to the drive, as these actions can overwrite recoverable files and compromise the integrity of the original medium.
What is the correct sequence for assessing external connections and data safety?
First, confirm that all external connections are secure and stable. Only after verifying the connection should you proceed with a read-only assessment to ensure target data has not been confirmed safe.